A STEP BY STEP GUIDE ON HOW TO GET STARTED
Classroom transformations are a unique way to engage your students in learning. Over the past few years, many teachers across the world have adopted the idea of transforming their spaces into unique places where they can teach and engage their students to learn creatively.
When I first started transforming my classroom, I had no idea what I was doing. That's usually how it begins with me, total confusion! I soon figured out what worked for me and I'd love to share my strategy with anyone who is considering a classroom transformation in the near future but aren't sure where to begin.
You might be asking yourself, "Why would I want to spend money on transforming my classroom when I know I'm not going to get reimbursed?"
Here are some tricks and tips I keep in mind with my transformations for keeping costs low.
1. Start Simple.
You don't need to go wild. Begin with simple signs on butcher paper for the walls and some table cloths from the Dollar Tree for tables and desks. If the room looks even a little different, your kids will buy into it.
 |
| This was a tablecloth I got from Walmart that I reuse every year for skip counting! |
 |
| The tablecloth on the table and the ones hanging in the background I got from Dollar Tree and the football banner I picked up at Walmart. These are all cheap and reusable. |
 |
| I created this Ticket Booth from my school's butcher paper stock. Again, FREE! |
2. Use Items You Already Have.
Look around your house or in your attic. Do you have decorations or costumes from an old party you had before? Use those!
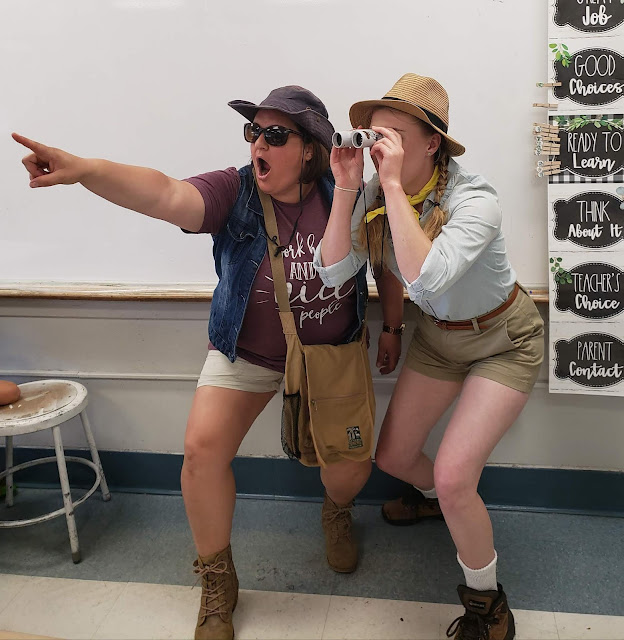
My family goes camping a lot so we have tons of camping gear. That was my first transformation because I didn't need to buy ANYTHING! I used what I had available.
 |
| All these items I had at my house. The only item I bought was the backdrop which I also use for my Polar Express transformation during the holidays. |
3. Shop Sales.
My favorite places to buy classroom transformation supplies are Dollar Tree, Oriental Trading, Walmart and yard/garage sales. Why? Because I find them to be the cheapest around. I also tend to shop at Amazon.com if the items I need are not in any of these other stores at a cheaper price.
 |
| The decor for my Coffee Shop (Starbucks) classroom transformation was from my school (butcher paper), Dollar Tree and Starbucks. The Starbucks cups hanging from the ceiling and on the tables were donated by my local Starbucks. The flowers, puffs on the ceiling and tablecloths were from Dollar Tree.
4. Invest in Items You Can Reuse Each Year.
|
I tend to buy items I can reuse each year AND items I can use in various transformations such as back drops and tablecloths.
 |
| The backdrop in this Harry Potter transformation I reuse in my King's Dungeon transformation as well. |
If you find that you need to keep throwing things out over and over again, you will be spending more and more money. Invest in items you think you can keep neat, clean and looking in top shape for the following year.
5. Buy a Few Items Each Year.
This is so important. I make a wish list for each of my transformations. I only buy the items I deem necessary to make the transformation successful for high engagement. Then each year, I buy one more item I think would be beneficial. This way, the cost stays low, I reuse the items from the year before and the transformation gets more elaborate as the years go on. Remember, the class you had the year before will never know you added to the decor, they only know and enjoyed what they had at the time.
 |
| I like to add costumes as I repeat transformations. Again, keeping it super simple and using what you already have keeps it cheap. |
6. Share with Your Colleagues!
This is the best! If you and your colleagues or teammates share items, you will have to buy a lot less. I have even heard of schools that have a "Transformation Closet" in their building where they have everything labeled in tubs and any teacher can borrow any transformation at any time. They also add to the tubs as they go and the whole school can borrow and share everything. What an idea!
There are a few things I like to take into consideration when trying to come up with a room transformation I want to create.
- What are my students interested in? What motivates them? Each year my students are very different with their interests and motivators. Some years I skip transformations with one class that I might have done in previous years with other classes. It is totally fine! Each group of youngsters change and have different interests.
- What is going on in the world? I have a Winter Olympics transformation I simply cannot do each year. It just doesn't fit my current events schedule. Can I adapt it, sure! Some years I use it as "Winter Sports."
 |
| Amazing Race Continent Review |
- What do I already have? Is there anything I have already that I can use to make the transformation I've been yearning to create? I am a huge Harry Potter fan so I utilized many things I had in the attic from Halloween to create my Harry Potter classroom transformation. I know 2nd grade is a bit young for Harry, but by the end of the week, my students made their parents get all the books for them. Talk about motivating!
Keeping the Rigor High
The most important part of a classroom transformation is the rigorous academics. That is the portion that is usually lost. Be mindful that a classroom transformation is to help keep your students engaged in your lessons.
You can use classroom transformations to teach new material or you can use your transformations to review what was already learned. Personally, I have done both. I have created materials for my students so I could customize what I wanted to teach, and I have also bought products from others to use within my classroom transformations that reviewed concepts I already taught.
Here are some examples of how to keep the rigor high within your transformation.
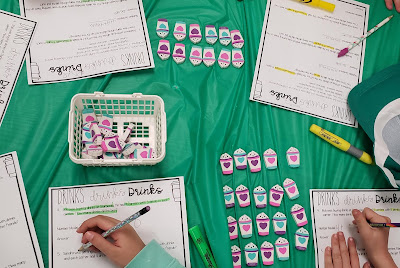
 For this station in my Coffee Shop transformation I was teaching my students how to multiply. We were investigating different ways to use multiplication and/or repeated addition to solve the problems while using little coffee erasers as manipulatives. This was a great way to give them hands on practice with a new math concept. These coffee erasers are from Oriental Trading Co.
  In my Harry Potter transformation I gave my students the chance to investigate with tangrams. My students had never seen these before, but when I explained how they were used, they were able to manipulate them for practice. I tied it into the Harry Potter theme and off they went!
  This product was not an original creation of mine. I adapted a Halloween Tangram product from Z is for Zebra on Teachers Pay Teachers to fit the Harry Potter theme in my transformation. I added a photo from Harry Potter to the back of each tangram card to make the connection. The back of this card is a photo of a dementor.
  During our reading block for my Coffee Shop transformation I had a book raffle where the children weren't allowed to see the covers of the books they were viewing. I like to call it, "Don't Judge a Book by its Cover." There was a catch to winning a book. The children needed to earn it. For each of the nine ballots my students received, they needed to tell me on the back if the book was fiction or nonfiction and how they knew. I needed some text evidence to make their ballot valid in the raffle. It was a great way to assess if they could identify story elements and nonfiction text features. Get creative with the academic rigor in your classroom transformations. Chances are, if your students are enjoying what they are doing the and atmosphere they are doing it in, they will totally forget it is school!
As always, if you have any questions as all please feel free to reach out to me at Kellycahill03@gmail.com Thanks again for stopping by Kaylynn's Place!
CAMP OUT

I like to start off the day sitting around the campfire discussing the essentials we might need for camping. I jot down what tends to be, a lengthy list on chart paper and then the students can only choose eight items from our list to take with them. They need to write them on their recording sheet and give me a good reason why they chose that specific item.
 |
For writing, I have the children complete a "how to" make S'mores craft. Before they begin, we talk about different ways to make these tasty snacks. The students decide which way they like best, fill out their graphic organizer and finalize their craftivity. I get these jumbo wooden skewers from Christmas Tree Shops. They are usually $1.99 for a dozen.
Since my class and I talk a lot about keeping the Earth clean, I like to do a fishing activity in the "pond." I have my students go fishing in the inflatable pool for animals and trash. First, they pull out a fish or trash with a magnetic fishing pole. On the back is a card telling a positive or a negative about what they took out of the pond. The class keeps tallies on their tally chart of how many negatives vs. positives they found as a group. After each child gets a turn to fish, they count their tallies and graph.
For STEM, I begin with a partner share about boats. The children discuss all they know about boats, what they are used for, how they work, what makes them special, etc. Then each child gets a 5" x 5" piece of foil to build a boat that can hold as many pennies as possible when placed onto a tray of water. The children fill out part of their recording sheet before they test their boat. After the boats are tested with the pennies, they fill out the rest, reflecting on what worked well and what they can improve for next time.
When I teach, I like to be sure there are some sort of brain breaks during the day. I love adding crafts as a relaxing brain break. For this camping transformation my colleague had a great idea to make firefly lanterns. I knew it would be PERFECT for this transformation. My Camp Out Classroom Transformation resource in my TPT store gives directions on all the materials and how to build these cute little glow lanterns.
By the time I have my classroom Camp Out, my students have written a few personal narratives or fictional writing pieces, so I like to give them a chance to share. Since we rarely have time for each child to share to the whole class, I break my students up into small groups and let them share within their group. Then if I have time, I will rotate some children so the groups get a good shake up. To give the kids a bit of a camping ambiance, I turn off the lights and let them use flashlights to read to their friends as if we were telling stories by the campfire.
My final activity for the day is to set the mood by playing sounds of the nighttime forest and have the children relax while reading a book with a flashlight. It's such a simple activity, but they LOVE it! If you get the chance to have a camp out classroom transformation, please tag me in your posts or email me. I'd love to see how it turns out. If you'd like to grab my Camp Out Classroom Transformation resource it will give you step by step directions on what I do in my room. Thanks for stopping by! Happy Camping!
Coffee Shop (Starbucks)
In my opinion, one of the best ways to keep students engaged is to have a classroom transformation. They can be as extravagant or as simple as you want. Either way, the students will want to be a part of what you have in store for the day (or week).
My students know I love Starbucks, so it was only natural that I would transform the classroom into a cafe at some point during the year.
The decor was super simple. I got green tablecloths, green tissue pompoms for the ceiling and yellow flowers at the Dollar Tree. I used white butcher paper to create the Starbucks sign on the wall as well as green butcher paper and chalk to create "Today's Menu" for the wall.
I also used Starbucks cups to hang from the ceiling and to put flowers in for the tables in my room.
Other items that added to the ambiance were aprons and hats that I purchased from Oriental Trading Co. for the children to wear. I got my Starbucks apron off Ebay.
Now for the Content!
I knew I wanted this transformation to be a few days based on the material I wanted to cover. For this particular transformation I went cross curricular with the content. The subjects I touched upon were reading, math, writing and science.
- Reading:
I did two reading activities. The first one was a nonfiction reading passage about tea and coffee. The students completed reading comprehension questions about the passage and then they filled out the Venn Diagram based on the passage. This was a text structure we were working on for two weeks.
The other reading activity was Don't Judge a Book by its Cover. This was an idea based on an idea from Hope King. I usually get many free books from Scholastic Book Clubs for my classroom library each month when my students place orders. I save these books for this activity. I try to get at least one for each student in my class. Sometimes I get a few extra.
 I teach many lessons through out the school year on not judging a book by its cover and and choosing a "just right book" based on interest and level. I wrap each book COVER in brown paper from the Dollar Tree and I print the numbered tags on sticker sheets I found on Amazon.
I label each book with a numbered sticker and place them around the classroom for the children to “taste” by reading a page or two. If the student likes the book and wants to try and “win” the book to borrow, they can fill out the double sided tag about the book.
On one side they write their name and the book number. On the flip side they write if they think it is fiction or nonfiction, how they know and why they want to be the first in the class to read it. After all the students have filled out all of their raffle tickets, we have a book raffle. Whoever wins the book gets to borrow it from our class library first. Then all the books are eventually part of our classroom library. Win, win!
- Math:
For math I had centers set up with a coffee shop theme. These are the activities I did with my students. I set up each as a station with various materials for the students to use. Each station had an activity sheet and manipulatives.
Donut Shop Math: I used mini donut erasers from Oriental Trading but you can print and laminate mini donut pictures or just use the worksheet and have your students draw pictures.
What’s the Cost?: For this activity I laminated a menu and had my students use fake money to work out each problem.
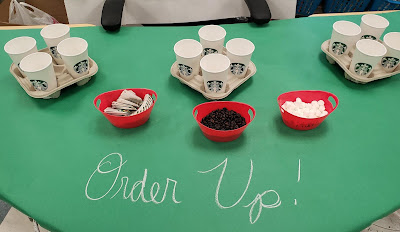
Order up: I used “to go” coffee cups and holders (donated by a local Starbucks), coffee beans, marshmallows and tea bags for a real “barista” experience for my kiddos. You can certainly use pictures of these items laminated and regular cups.
Drinks Drinks Drinks: I used mini coffee cup erasers from Oriental Trading but you can print and laminate pictures of cups or just have your students draw pictures.
- Writing:
For creative writing, my students had the chance to create a new drink for the coffee shop or a coffee shop store front. They got a planning sheet to fill out about what they wanted to create. For their final copy, students created a flip book with all of their drink or store front information. Adding final touches of color to their design made their creation become realistic.
- Science:
My students love science! They love investigating new things and using what they know to make accurate hypotheses. That is why this was a great experiment for them. They know a bit about mixing colors from art class so it was perfect. We used coffee filters, black markers and water droppers.
We spoke about colors, what they knew about colors and what they thought was going to happen when we added water to the black dot in the center of their coffee filter. The children were pleasantly surprised at their results. As was I. My students were so engaged with this activity they even asked to do it again!
I found that this classroom transformation was my students' favorite this year. I honestly think it was because they were able to become the baristas for the week. Thank you for checking out this classroom transformation. I'd love to help you plan one for your classroom. Feel free to email me any questions you might have about this, or any other classroom transformations. Thanks for stopping by!
Jurassic Park
Jurassic Content:
There were a few items on my agenda I knew I wanted to teach over these few days.
- Types of fossils (impression, amber, body and trace)
- Fossil classification
- Carnivore, herbivore, omnivores traits/characteristics.
- Then I threw in review items I wanted to be sure they grasped with math and social studies.
Types of Fossils:
Over our few Jurassic Park days we discussed what fossils are, how they form, and the types. We watched several videos and made a few types of fossils.
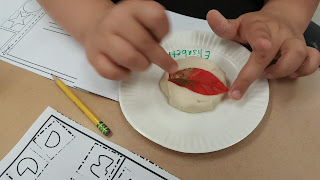
The first type of fossil we made was an impression fossil. We mixed up three batches of salt dough.
Recipe for one batch:
1 cup flour
1 cup salt
1/2 cup water
Mix until a dough forms.
I gave my students a variety of items to use for pressing into the salt dough. Flowers, leaves, animals, shells, shark teeth, bugs and sticks to name a few.
My students loved the way they came out. I also gave the children the option to paint their fossils when they dried completely.
Another fossil we studied was the amber fossil. After watching how an amber fossils forms, I showed the children some different examples of amber. Then we began to make our own.
To make "amber" You only need a few items.
- clear shot glasses from Dollar Tree
- plastic bugs
- clear glue (white doesn't work)
- red food coloring (1 small drop)
- yellow food coloring ( 2 to 3 drops)
- tooth picks for stirring
To make a trace and body fossils, I let my students form them out of modeling clay on their own.
Fossil Classification:
These next activities took place on the last day of Jurassic Park after the children were able to master the idea of the different types of fossils. They had a bit more practice at this point and felt more confident with the concepts.
The first activity was a paleontologist fossil dig. Before we did any digging, the children learned what a paleontologist does and what tools he or she uses. We talked about the importance of being very carful and working slowly as to not break the fossils.
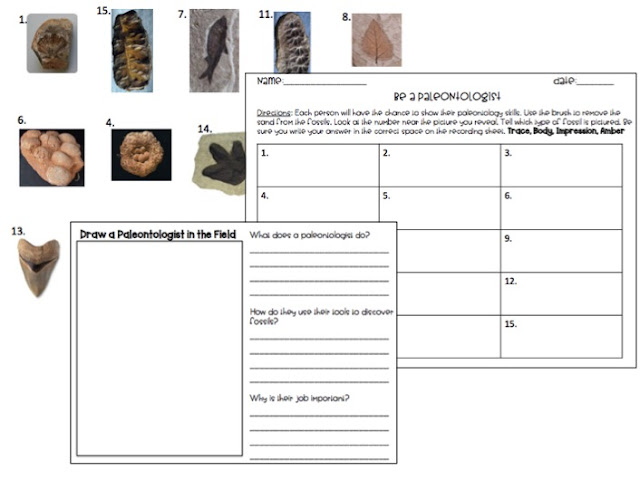
For this activity I laminated a sheet of numbered, colored fossils. (shown below) I placed those into an aluminum pan under some sand and rocks. I threw in a small paint brush and gave my students a recording sheet.

I had five pans and only hid three fossils in each pan. The children rotated to each pan switching the paleontologist for each. This way, every child got a turn digging up fossils.
After each fossil was dug up, the children needed to classify them as either trace, body, impression or amber. They matched the number of the fossil with the number on their recording sheet. Total engagement! They had a blast digging and I had a blast watching them recall what they learned about fossils.
If the kids finished early and were waiting on another group, they filled out a sheet about paleontologists and what they learned about their jobs and tools.
The second fossil classification activity was also a bit of a social studies review as well. Since we studied the seven continents earlier in the year, I wanted to tie that into our fossil unit. I divided the students in to groups and them that there were pieces of fossils hidden all around the world on different continents and they needed to go retrieve them.
I placed buckets with continent signs on them around the school and I started each group with a puzzle piece to a fossil they needed to find. I gave one student per group a clue about a continent. If they named the correct continent described, they raced through the school to get their puzzle piece from that continent's bucket. When they brought it back to the classroom, the next member of their group got a clue and did the same thing. After a group finished collecting all of their puzzle pieces, they assembled it and recorded what the fossil looked like on their paper. They colored, classified and measured their fossil.
The next step was to flip the puzzle pieces over and read about how the fossil formed. This was a test to see if my students remembered how to put facts into their own words without plagiarizing. That was a skill we worked on a lot this year.
My students worked together really well for this activity. It got them up, moving and most importantly, THINKING!
Carnivore, Herbivore and Omnivore Traits and Characteristics
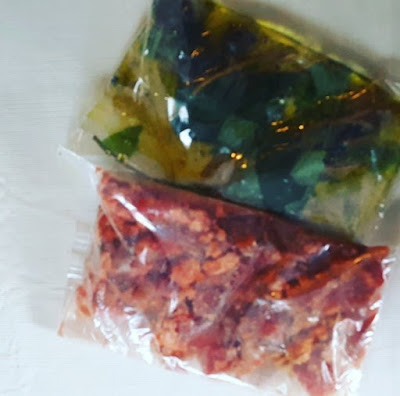
To begin these lessons, I had my class sit in a circle and I told them I found some dinosaurs who are very ill and we need to help. I told them I collected the stomach contents to see if they ate something that make them sick. I passed around two zipper bags filled with carnivore insides and one with herbivore insides. We talked about what these dinosaurs possibly ate. Then I showed the pictures of several herbivores and carnivores. The kids pair shared what they noticed about the body, teeth and leg difference in the two types of animals. It was a great discussion that helped my students learn a lot.
Next, I had the children choose a dinosaur silhouette. Based on what they learned about carnivore's and herbivore's body types, they needed to feed their dinosaur the right food. Each child got a grocery store circular and they needed to cut and paste the foods onto their dino silhouette.
On the last day of Jurassic Park we continued to talk about other ways people can find out what animals and dinosaurs ate. Sure enough the kids knew...THE POOP! My students had the feeling of what they would be digging in as soon as I pulled out those plastic gloves. You guessed it! Dino dung! I got this idea from Hope King at Elementary Shenanigans. I had the kids looking for items within the dung (chocolate cake mix and water) to see if they could figure out what their animal ate. After rinsing off several clue items (fish, sticks, leaves, bugs, animal bones etc.) they recorded if their animal was a herbivore, carnivore or omnivore giving valid justification of course.
This was by far their favorite activity of the unit. They will talk about this in years to come!
Review Activity
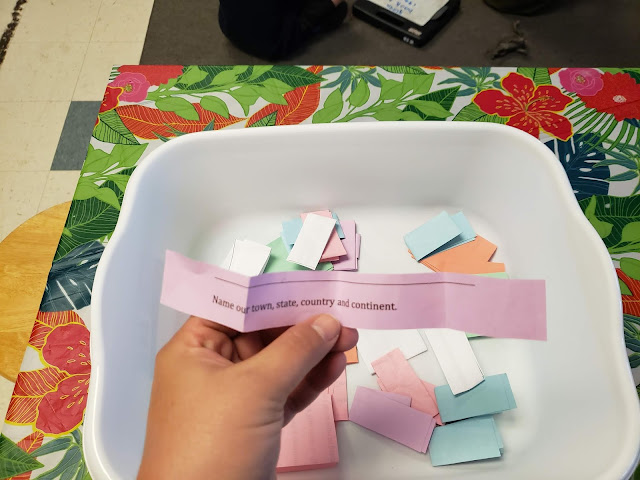
Finally, I needed to throw in a few review questions for practice. My colleague had a fantastic idea to use with groups that she let me use with my class. She printed T-Rex bones on different colored paper. It was a different color per team. Then a variety of review questions were printed and cut out on the same colors, folded and paced into a bucket.
One at a time each team took a question. If they answered it correctly, they earned a bone to their dinosaur. Once their team collected all the bones, they assembled their dinosaur, drew it on poster paper and colored it. The activity was simple, quick and engaging.
Jurassic Decor:
The decor for this transformation was ultra simple. Most of the decor was butcher paper from my school's stockroom. Other items I bought from the Dollar Tree such as flower table cloths, hula skirts and dinosaur masks. The only other item I bought was caution tape that I used for other things during the school year so I had it on hand already.
I hope these ideas can help you plan your Jurassic Park classroom transformation. Please tag me on Facebook or Instagram when you decide to do this transformation.
If you would like to grab my Fossil Activities to help you get started CLICK HERE or visit my Teachers Pay Teachers shop Kaylynn's Place by clicking "Shop" at the top of my blog.
 |
| Click Here to grab this resource in my TPT Store. Glow Day |
DECOR:
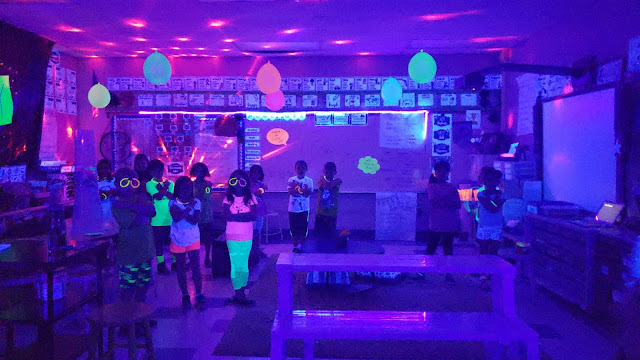
For the decor I shopped at several places but the prices were reasonable. Especially since I will reuse these items I bought.
- Window Black Out: Home Depot - I purchased a painting plastic drop cloth. I have a whole wall of windows so I got the 50ft x 10ft.
- Black Light Reactive Tape: I got this on Amazon.com and it came with several colors.
- Black Light Reactive Balloons: I hung these from the ceiling as decor. They glow really well.
- Black Lights: 3 Fluorescent Black Light Fixture: Party City
- Party Lights: These are not a must, but it added to the atmosphere.
- Glow Glasses: Even though the glow sticks died after the first day, I collected the attachment pieces from the kids so I can reuse them for my class next year. That is a huge money saver!
- Neon Posters: I got these from The Dollar Tree. I cut them in half and used blue tape to create the giant " GLOW DAY" letters for the main wall of my classroom. I also cut them into speech bubbles and clouds and wrote fun little "glow" messages on them.
I decided to do this transformation to review our reading, math and grammar concepts for the year. For the content I used all Toothy Task Cards from Lucky Little Learners and I printed them on Astrobrites neon paper so they would glow in the black light. That was basically all I used for our review. I love these cards because they have a self check feature on the back. This way, there wasn't much grading to be done.
You can basically use any task cards for this depending on the content you want to review and or teach for Glow Day(s).
ACTIVITIES:
Glow Introduction: To begin our Glow Day extravaganza we watched a Mystery Doug video about how things glow in the dark. We had a discussion in which many great questions were asked about plants and animals that glow.
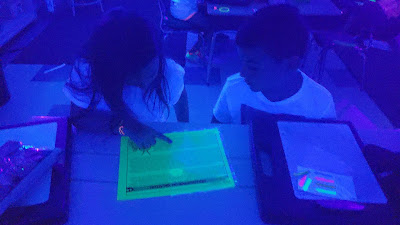
Text Evidence: Then I partnered the kids up and gave them a reading passage where they needed to "tag" their answers with neon Post-It flags to cite their evidence.
Because of the black lights, neon tags and glowing passages, the engagement was unbelievable. If I did this same activity without the glowing atmosphere, it would not have had the same effect.
Fast Finisher: I also had a noun activity for the kids to complete as they finished their tasks early. I hung a set of picture cards around the room and they were backed on neon paper so they would glow. The children needed to write one noun they saw within the picture. They wrote their answer on their recording sheet.
Tic Tac Toe Sequencing Events: Sequencing is an important skill in elementary school and I needed to make sure I was giving my students tons of practice. For this activity. I split my students up into four groups and made two tic-tac-toe boards on my whiteboard. Two teams would play each other on one board and the other two teams would play each other on the other board.
Next, every student got a communicator/plastic sleeve with a sequencing reading passages printed on neon glow paper. If you do not have these plastic sleeves, you can just laminate them. I wanted to be sure I got simple reading passages with an easy way to check the answers for each child.
Here are the rules of the game:
1. Every student must work independently reading their passage and putting their events in order.
2. When they are finished, they get their passage checked by the teacher. (Be sure you have an answer key handy.)
3. If they get their answers correct they may either put a mark on the board for their team OR erase one mark from the other team. If they are not correct, they must fix their answers and get rechecked.
4. The student erases their board and gets a new passage.
5. This goes on until one team on each board wins. You can just put tallies and continue playing or switch teams.
Free Write Time: During free writing time I had my students write in their writer's notebooks with secret coding pens. These pens glow wonderfully when the kids shine the lights on them.
Center Activities:
For all of these activities, the children needed to answer a question correctly on the task card before they got a turn. That was the routine for each center so the children knew the rules before they began.
 1. Jumbo Kerplunk: I taped the ends of the sticks with extra glow tape I used for the decor around the room. I also purchased some glow ping pong balls for the inside of the game. You can also put glow tape on the balls that come with the game if you do not want to buy glow ping pong balls. If you cannot get the Kerplunk game you can certainly use any other game that glows, or adapt a game you already have so it glows by adding glow tape or cards.
 2. Jumbo Jenga: For this center game I used the neon tape on the edges so the blocks of the game would glow in the black light. The kids would take turns answering questions and pulling blocks.
3. Target Practice: For this activity I drew a target on my dry erase board with a dark marker and bought some suction dart guns at The Dollar Tree. You do not need to use these guns but you can use anything that will stick to the target. My students wanted to keep track of the points earned (extra addition practice) but you do not have to.
4. Bottle Flip: For this center I saved four small gatorade bottles and filled them about 1/3 with water. Then I poured a sprinkle of glow powder into each to make them glow. Of course the children needed to answer questions correctly before flipping!
5. Flip Tac Toe: On my back table I made a tic-tac-toe board out of glow tape. Then I marked some neon plastic cups with two different colors on the bottom. The kids needed to flip their cup until it landed up-right. Then they got to place their cup on the board.
6. Slam Dunk: For this center I used plastic neon cups with point values written on them. The kids shot light weight neon pool balls into the cups.
Although these are the six centers I used, there are so many other ideas you can use for neon games.
I hope this post gave you some suggestions if you are planning a glow day transformation for your classroom. As always, feel free to email me any questions and tag me in any glow day posts! Happy teaching.
Kelly

















No comments