Jurassic World Content:
There were a few items on my agenda I knew I wanted to teach over these few days.
- Types of fossils (impression, amber, body and trace)
- Fossil classification
- Carnivore, herbivore, omnivores traits/characteristics.
- Then I threw in review items I wanted to be sure they grasped with math and social studies.
Types of Fossils:
During our Jurassic World classroom transformation we discussed what fossils were, how they formed, and the various types. We watched several videos and made a few samples of fossils.
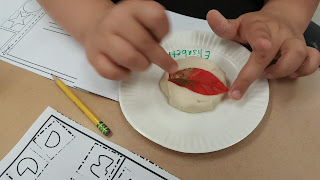
The first type of fossil we made was an impression fossil. We mixed up three batches of salt dough.
Recipe for one batch:
1 cup flour
1 cup salt
1/2 cup water
Mix until a dough forms.
I gave my students a variety of items to use for pressing into the salt dough. Flowers, leaves, animals, shells, shark teeth, bugs and sticks to name a few.
My students loved the way they came out. I also gave the children the option to paint their fossils when they dried completely.
Another fossil we studied was the amber fossil. After watching how an amber fossils formed, I showed the children some different examples of amber. Then we began to make our own.
To make "amber" You only need a few items.
- clear shot glasses (I got mine from The Dollar Tree.)
- plastic bugs
- clear glue (white doesn't work)
- red food coloring (1 small drop)
- yellow food coloring ( 2 to 3 drops)
- tooth picks for stirring
To make a trace and body fossils, I let my students form them out of modeling clay on their own.
Fossil Classification:
These activities took place on the last day of our Jurassic World classroom transformation. After the children were able to recall the different types of fossils, they felt a bit more confident.
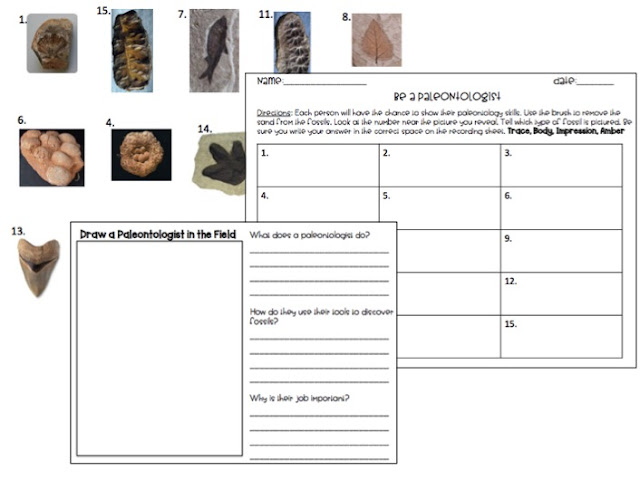
The first activity was a paleontologist fossil dig. Before we did any digging, the children learned what a paleontologist does and what tools he or she uses. We talked about the importance of being very carful and working slowly as to not break the fossils.
For this activity I laminated a sheet of numbered, colored fossils. (shown below) I placed those into an aluminum pan under some sand and rocks. I threw in a small paint brush and gave my students a recording sheet.

I had five pans and only hid three fossils in each pan. The children rotated to each pan switching the paleontologist for each. This way, every child got a turn digging up fossils.
After each fossil was dug up the children needed to classify them as either trace, body, impression or amber. They matched the number of the fossil with the number on their recording sheet. Total engagement! They had a blast digging and I had a blast watching them recall what they learned about fossils.
If the kids finished early and were waiting on another group, they filled out a sheet about paleontologists and what they learned about their jobs and tools.
The second fossil classification activity was also a bit of a social studies review as well. Since we studied the seven continents earlier in the year, I wanted to tie that into our fossil unit. I divided the students in to groups and told them there were pieces of fossils hidden all around the world on different continents, and they needed to go retrieve them.
I placed buckets with continent signs on them around the school and I started each group with a puzzle piece to a fossil they needed to find. I gave one student per group a clue about a continent. If they named the correct continent described, they raced through the school to get their puzzle piece from that continent's bucket. When they brought it back to the classroom, the next member of their group got a clue and did the same thing. After a group finished collecting all of their puzzle pieces, they assembled it and recorded what the fossil looked like on their paper. They colored, classified and measured their fossil.
The next step was to flip the puzzle pieces over and read about how the fossil formed. This was a test to see if my students remembered how to put facts into their own words without plagiarizing. That was a skill we worked on a lot this year.
My students worked together really well for this activity. They were up, moving and most importantly, THINKING!
Carnivore, Herbivore and Omnivore Traits and Characteristics
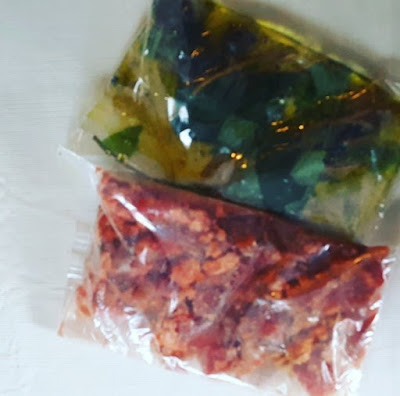
To begin these lessons, I had my class sit in a circle and I told them I found some dinosaurs who are very ill and we need to help. I told them I collected the stomach contents to see if they ate something that make them sick. I passed around two zipper bags filled with carnivore insides and one with herbivore insides. We talked about what these dinosaurs possibly ate. Then I showed the pictures of several herbivores and carnivores. The kids "pair shared" what they noticed about the body, teeth and leg difference in the two types of animals. It was a great discussion that helped my students gain a background.
Next, I had the children choose a dinosaur silhouette. Based on what they learned about carnivore's and herbivore's body types, they needed to feed their dinosaur the right food. Each child got a grocery store circular and they cut and pasted the foods onto their dinosaur's silhouette.
On the last day of our Jurassic World classroom transformation we continued to talk about other ways people can find out what animals and dinosaurs ate. Sure enough the kids knew...THE POOP! My students had the feeling of what they would be digging in as soon as I pulled out those plastic gloves. You guessed it! Dino dung! I got this idea from Hope King at Elementary Shenanigans. I had the kids looking for items within the dung (chocolate cake mix and water) to see if they could figure out what their animal ate. After rinsing off several items (plastic fish, sticks, leaves, bugs, animal bones etc.) they recorded if their animal was a herbivore, carnivore or omnivore, giving valid justification of course!
This was by far their favorite activity of the unit. They will talk about this in years to come!
Review Activity
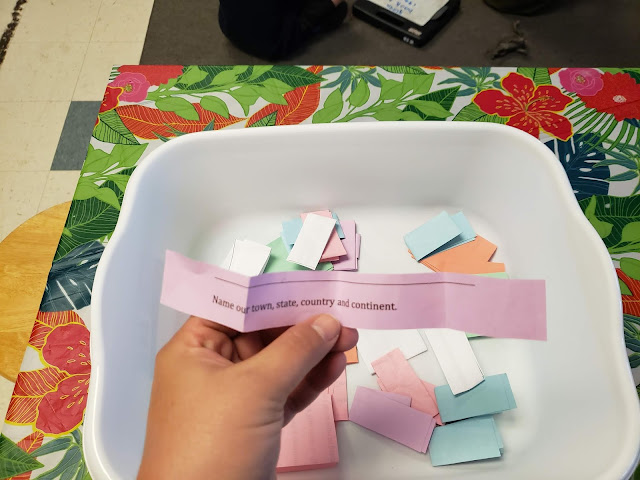
Finally, I needed to throw in a few review questions for practice. My colleague had a fantastic group idea. She printed T-Rex bones on different colored paper. It was a different color per team. Then a variety of review questions were printed and cut out on the same colors, folded and paced into a bucket.
One at a time, each team took a question. If they answered it correctly they earned a bone to their dinosaur. Once their team collected all the bones they assembled their dinosaur, drew it on poster paper and colored it. The activity was simple, quick and engaging.
Jurassic World Classroom Decor:
The decor for Jurassic World was ultra simple. Most of the decor was butcher paper from my school's stockroom. Other items I bought from The Dollar Tree such as flower table cloths, hula skirts and dinosaur masks. The only other item I bought was caution tape that I used for other classroom transformations during the school year, so I had it on hand already.
I hope these ideas can help you plan your Jurassic World classroom transformation. Please tag me on Facebook or Instagram when you decide to do this transformation.
If you would like to grab my Fossil Activities to help you get started CLICK HERE or visit my Teachers Pay Teachers shop Kaylynn's Place by clicking "Shop" at the top of my blog.
 |
| Click Here to grab this resource in my TPT Store. |











Loyalty bonuses 점보카지노 and promotions – particular presents and perks for loyal players. VIP players usually receive a dedicated on line casino host and exclusive promotions along with invites to particular events. Live sellers offer up thrilling chatter, actual card shuffling and wheel spinning and the chance to speak along with your opponents because the video games play out. Thanks to software program builders like Evolution Gaming and NetEnt, have the ability to|you probably can} enjoy extensive range|a variety} of video games in excessive definition and in real-time.
ReplyDelete